

Lavenders are hardy, resilient plants that thrive in their native Mediterranean range in full sun, with well-drained, sandy soil that is low to medium in fertility.
Lavenders can be very easy, drought-tolerant plants to grow as long as you replicate some of the conditions of their natural range.
In this article, I have listed the 8 most common reasons lavenders die or appear to be dying and have the solution to each problem. So keep on reading to find out why your lavender is dying and what you can do about it.
The most common reasons for dying lavender plants:
- Over Watering Lavenders (Drooping Appearance with Brown Foliage)
- The Soil Drains Too Slowly (Too much Moisture Around the Roots)
- Not Enough Sunlight (Lavenders need at least 6 hours per day)
- Wrong Soil Acidity (pH 6.5-7.5 is optimal)
- Wrong Lavender for Your Climate
- The Climate may be Too Humid For ideal Lavender Conditions
- Aggressive Pruning into Woody Growth
- Foliage Turning Yellow (Excess of Nitrogen in the Soil)
1. Over Watering Lavenders (Drooping Appearance with Brown Foliage)
The most likely reason your lavender is dying is because of overwatering. Lavenders thrive in the scorching dry summer weather in the Mediterranean region of Europe. Therefore lavenders are exceptionally tolerant to droughts and require relatively little water to be healthy and produce flowers.
If lavender receives too much water it will develop the disease root rot and show symptoms of stress such as a drooping or wilting appearance and a browning of the foliage.
It is very common to mistake the drooping appearance and brown foliage as an underwatered plant at which point a lot of people compound the problem by watering even more and consequently, the root rot becomes worse and the plant dies quickly.
Lavender roots need to live in dry soil that drains quickly and holds little moisture around the roots. If you water your lavender as frequently as other plants in your garden you will eventually kill the plant.
In fact, established lavenders (more the 2 years old) are so hardy that in temperate climates they will not need any additional water at all, attaining more than enough water from rainfall, even during dry spells in the summer.
Lavenders have the ability to tolerate drought in some of the hottest and driest regions of Europe, so when it comes growing lavender, over watering rather then under watering is always the problem.
However, if you follow the guidelines and reduce watering you can successfully rescue overwatered lavenders after a few weeks.
The solution.
If your lavender is showing signs of being overwatered then you will need to stop watering the plant for at least three weeks, and if possible protect the lavender from rainfall (move recovering potted lavenders inside during the rain).
This will give the soil a chance to drain and the roots the opportunity to dry out and recover from root rot.
You will need to prune any areas of affected foliage just below where it is brown with a sterile pair of pruners.
After three weeks without water, the plant should look much healthier and you can resume a normal watering schedule.
Here is a table for quick reference on watering lavenders successfully.
| Conditions for Lavenders | How Often to Water Lavender |
|---|---|
| Recently planted Lavenders | Once per week for the first four weeks. |
| Lavender in first two years of growth | Once every two weeks if there is little or no rainfall during this period. |
| Established Lavenders (more then 2 years) | No water is required if there has been any significant rainfall. |
| During exceptional dry and hot weather | Once every two weeks during hot, drought-like conditions with a good soak. |
| During Winter | Once per month indoors, outdoor lavenders will not need watering in Winter at all. |
| Potted Lavender | Once every two weeks with a good soak. |
Lavenders in the first two years of growth will need watering once every two weeks during the spring and summer months. If there has been significant rainfall and overcast days within a two week period then you can skip watering for the next two weeks.
Established lavenders often will not need any watering except if the weather has been hot and dry for more than two weeks.
How much water really depends on the soil type but if you have quick draining sandy soil (which lavenders prefer) then you can afford to give lavenders a good long soak, so that water reaches the roots rather a light water which may not infiltrate far enough into the soil.
Most lavenders will attain all the water they have during their winter dormancy from occasional rainfall, but if you have had a dry winter or you have taken the lavender inside over winter as protection from frost the the lavender will appreciate watering once per month.
Potted lavenders need more care and attention when it comes to watering so I wrote another article on watering lavenders in pots and how to care for lavenders in pots.
Another factor to consider is whether your soil drains quickly enough as lavenders prefer sandy soil (more about that in the 2nd section) as these problems are often related.
If your lavender has a drooping appearance but no browning foliage then it may be because of the soil fertility so, check out my article for the solution.
If you scale back watering to the appropriate amount and your soil drains quickly, your lavender should recover in about three weeks and show no sign of ill effects by the next season.
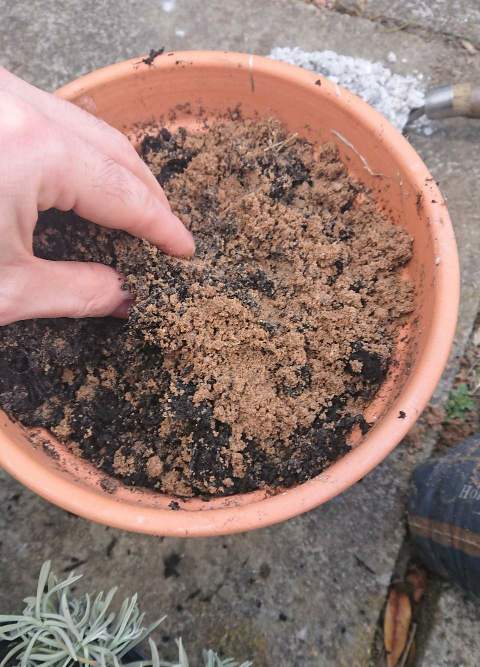
2. The Soil Drains Too Slowly (Too much Moisture Around the Roots)
Lavenders prefer soil that is sandy with a friable structure that allows water to drain through quickly without holding onto moisture.
Lavender will not do well in clay soils, soils that are heavy and compacted, or soil that contains a lot of organic matter as they will likely hold onto water which leads to the disease root rot, and the plant will turn brown and slowly die.
The signs of stress from slow-draining soil are the same as if the plant was over-watered. A drooping appearance and a browning of the foliage will be the first symptoms and you should act immediately.
The solution.
First of all, you will need to make sure that you are not overwatering the lavender as this will quickly compound the problem.
What you need to do is either:
- Move the lavender into a pot for superior drainage.
- Temporarily remove the lavender from the ground, amend the soil with sand or grit, and then replant the lavender.
It is always better to have more sand or grit in the soil when growing lavenders than not enough as sand promotes good drainage and will be less fertile than other materials which replicates the natural lower fertility of soils in their native Mediterranean.
In terms of proportions, the planting area for lavender should be around 30% sand or grit to 70% soil in most climates, but I have used as much as 50% horticultural grit to 50% soil in climates with higher rainfall.
This should be ideally mixed to a depth of 18 inches as this will accommodate the root system of lavender when it is fully mature if you are planting in the ground rather than in pots.
Watch this video to see a quick guide to the best potting mix for lavenders…
To amend the soil of lavenders that are already planted in beds you should lift them out gently with a fork and dig or till the sand and grit into the bed to at least 18 inches and then replant the lavender.
To further count act water retaining soils, you can:
- Create raised beds for lavender
- Plant lavenders in pots (see my full guide on growing lavenders in pots)
- Or simply mound the earth about 6 inches higher than the rest of the bed so it sits above more moist soil and encourages quicker drainage.
Once you have either moved the lavender into a pot or amended the soil with sand and grit in the planting area then it should take around 3 weeks for the roots to dry out properly and the drooping appearance should alleviate.
If there is foliage that has turned brown then you should clip it off just below the affected area and the plant should eventually return to full health.
3. Not Enough Sunlight
In their native Mediterranean range (Italy, Southern France, and Spain) lavenders enjoy full sun all day.
However, you do not need a Mediterranean climate to grow lavenders but you must ensure that they are in the sunniest location of your garden.
The duration and intensity of sunlight your lavender receives are correlated to the number of flowers, oils, and aromas your lavender will produce.
Lavenders need at least 6 hours of direct sunlight per day during the spring and summer months to grow successfully. If they receive less the 6 hours of sun lavenders will have disappointing growth, a lack of color in the leaves with poor fragrance, and potentially die back.
Sunlight also drives evaporation from the surrounding soils can reduce humidity and minimizes the chance of diseases such as root rot in lavenders.
The solution.
If your lavender displays poor growth, and a lack of flowers then you need to move the plant to a sunnier location in your garden.
If your lavender is potted then this is very easy and just a case of finding an area of your garden that receives more the 6 hours of sun per day, however you may have to carefully transplant any lavenders planted in shady areas of the garden,
The best time to transplant a lavender is in the late winter or early spring as this will limit the effects of transplant shock, although lavenders are hardy and will tolerate planting at any time of year if necessary.
To transplant lavender you must tease it gently out of the ground with a fork (try not to use a spade or shovel), making sure you are not damaging any roots.
Simply re-home the lavender in a sunny spot (about 2-3 feet away from other plants) with well-draining, sandy soil, that has medium to low fertility.
Firm the ground around the lavender to provide some stability but do not compact the ground as this will hinder the lavender root growth.
If you have transplanted the lavender during the spring and summer months then water your lavender once per week for the first four weeks, then revert to a normal once every 2-week watering schedule.
If you have re-homed the lavender in the fall or winter then water well immediately after planting, and water once per week for three weeks. After three weeks, you will need to water the plant infrequently as rainfall is often higher in fall/winter and the soil tends to hold onto moisture for longer.
4. Wrong Soil Acidity (pH 6.5-7.5 is optimal)
Lavenders can grow in both mildly acidic and alkaline soils that range from pH 6.5 to pH 7.5.
If the soil is more acidic than pH 6.5 it is unlikely the lavender will live for very long or achieve its full potential of producing blooms, healthy growth, and fragrance.
Lavenders are very well suited to chalk soils which tend to be alkaline and well-draining.
Most garden soils are either neutral or slightly acidic as this is the pH level that organic matter will be once fully decomposed and most potting mixes are usually pH 7 (neutral) and therefore will be suitable for growing lavenders in pots but you should always check the manufactures instructions.
If you are unsure of your garden soil’s pH level then I recommend you purchase an inexpensive soil test kit from Amazon which is very easy to use and available for a great price!

If you find that the soil is too acidic then you will need to amend your soil with lime or wood ash to stop your lavender from dying.
The solution.
If you have tested your soil and determined that it is too acidic, for growing lavender (less than pH 6.5) then I would recommend transferring the lavender to a pot with new soil (use 70% potting soil and 30% sand for drainage) as a matter of urgency.
Whilst Spring is the best time for moving lavender, transplanting a lavender from the ground can be tolerated by the plant at any time of year if necessary.
However, there are some steps you should take which will help minimize transplant shock. Take a look at my article on growing lavender in pots for the full care guide.
Once you have transferred your lavender to a pot, it will be perfectly happy as lavenders of all varieties do very well in pots or you can keep it potted temporarily, whilst amending the soil and then eventually replant the lavender in its original spot.
To raise the pH of soil from ‘too acidic’ to the right range for lavenders you can add a lime amendment. Lime can be purchased online or from garden stores and added to the soil, to raise the pH towards neutral or alkaline depending on the quantity you use.
The application is relatively simple, all you will have to do is dig or till the lime into the soil to a depth of around 18 inches. The best time to do this is in the fall. Influencing the pH of garden soil for the long term will require patience and frequent retesting on the soil to ensure you have brought about a meaningful change in the soil that will last.
Lime is relatively inexpensive and you should always follow the manufacturer’s guidelines for information on exactly how much lime you should add to the soil as you don’t want to add too much and end up with soil that is far too alkaline.
If you have acidic soil I personally recommend just planting lavender in pots as this is far easier.
In almost every circumstance if there is a problem with soil pH in relation to lavenders it will be due to overly acidic soils rather than soil that is too alkaline.
5. Wrong Lavender for Your Climate
As previously stated, lavenders originate in the Mediterranean region of Europe where they grow in conditions of full sun and high temperatures all day with little rainfall.
The Spanish, French, and Italian lavender species and their various hybrids are less tolerant of cold weather and frequent winter frosts often dying over winter if exposed to these conditions compared to the more hardy English lavender cultivars.
However, the English species of lavender still requires full sun but can grow, produce flowers and aromas in much colder climates, and even tolerate regular frosts during their winter dormancy.
So if you are growing the Spanish, French, and Italian lavenders outside in cold climates then you will likely need to replace your lavenders every season.
But there are some solutions to avoid this…
The solution.
If you plan on growing lavenders in cold climates that experience cold winters then I would advise you to go with the English lavender species as this will take the cooler winters in its stride.
However, if you have any of the southern European varieties and you are in a cooler climate then you can re-home them in pots and place them into a heated greenhouse or bring them inside over winter to protect them from frosts.
Failing that, lavender is actually very easy to propagate so you can grow a production line of lavenders each year to replace ones that have been killed off by frost.
Here’s a helpful YouTube video for how to propagate lavender:
6. The Climate may be Too Humid For Lavenders
Humid climates with slow rates of evaporation are not ideal for lavenders as the soil tends to stay too moist for their roots which can lead to rotting or fungal diseases.
Lavenders that are in environments that are too humid will show similar signs of stress as though they were overwatered or in slow-draining soil with a drooping appearance and browning foliage.
Lavenders do prefer to grow in dryer climates with less moisture in the air, however, they are tolerant of sea spray and if you make some adjustments to their conditions, they will be able to cope with some humidity.
The solution.
For lavenders to cope with humidity you will have to space the plant at least three feet away from any other vegetation or corners of your garden.
The more exposed the location the better the airflow they receive and the better for the lavender.
Planting lavenders in pots would be a good idea as you can place them in the most exposed or windy location of the garden and keep them away from still air.
Of course, well well-drained soil and infrequent watering become even more important for lavenders in humid climates so consider lifting out your lavender carefully with a fork and amend the soil with more sand or grit for fast drainage and dryer roots.
Another great tip that I borrowed from commercial lavender growers is to use a white stone-like mulch surrounding the plant. You can purchase stone in modest quantities for a reasonable price from garden stores or building suppliers.

White stone or gravel not only looks elegant but it keeps the weeds down and reflects light very well.
The reflected light benefits the lavender (as they love full sun) and it can create a micro-climate when the sun is shining as the intense light will drive evaporation from around the leaves and result in a dryer environment.
The wider the area of white stone spread around the lavender, the more pronounced the effect will be, so be generous.
Just a few little adjustments like these lavenders can produce impressive blooms in humid climates.
7. Aggressive Pruning into Woody Growth
The number one golden rule when it comes to pruning lavenders is to only cut back into green foliage and never cut back into the woody growth.
Cutting back into the woody growth will lead to the lavender splitting and forming a poor shape or dying from shock.
The solution.
For best results you should cut back the spent flowers in late summer and prune lavenders in the spring.
Lavenders respond well to pruning as they only produce flowers on new growth.
Pruning should take place when new leaves start to grow at the base which is usually very early spring. You can prune up to a third of growth from the top to shape the lavender so it retains a rounded shape which prevents the plant from splitting.
Exactly how to prune is always explained best with a visual guide, so check out this YouTube video for a clear explanation.
8. Foliage Turning Yellow (Excess of Nitrogen in the Soil)
If the foliage of your lavender has turned yellow and perhaps has a leggy appearance then this is an indication of excessive nitrogen in your soil.
Nitrogen, phosphorous, and potassium are three essential nutrients that every plant needs to grow and a higher level of nitrogen in the soil can be a good thing for some plants.
However, lavenders thrive on neglectful care and actually grow and produce more flowers in soil that is medium to low fertility.
The soil in their native Mediterranean is relatively poor and sandy but it is in these conditions that lavenders grow best and produce the strongest aromas.
An excess in nitrogen could be due to the nutrient concentration in the soil or because of added organic or chemical fertilizer.
Established lavenders will not need any additional fertilizer. This advice is verified by the English Royal Horticultural Society and from personally speaking to commercial lavender growers in California as well as first-hand experience.
Fertilizer and even soil that is naturally rich will promote a leggy appearance with fewer if any flowers and less fragrance and therefore should be avoided.
The solution.
The solution depends on what the source of the excessive nitrogen is.
If you have used fertilizers on your lavenders then you should cease applying fertilizer immediately and your lavender should give a better showing next season.
If you haven’t added any fertilizer and the lavender is yellow then it is possible that the soil is too high in nutrients for lavender.
In this situation, you can either move the lavender to a pot with 70% potting soil and 30% sand or grit. Or you can dig up the lavender and add plenty of sand and grit to the planting area before replanting.
This is not an exact science but bear in mind the soils where lavenders originate can have a very high proportion of sand or gravel so adding a large amount of sand will not be to the lavender’s detriment and will actually recreate the soil conditions of their native environment.
If you are amending a flower bed you will need to amend the soil to a depth of 18 inches with sand or grit (either works well). Sand does not contribute any nutrient value to the soil which will counteract soil that is naturally high in nitrogen.
In these situations, I have personally seen soil that was amended so that it was around 50% and 50% soil, and lavender fully recovered by the next year (after a regular late summer and early spring prune) and produced a bountiful bloom.
(Read my article, how to care for lavenders in pots).
Key Takeaways
- To save a dying lavender, recreate some of the conditions of its natural habitat by planting it in well-draining sandy soil, locating it in full sun, and only watering the lavender in times of drought. Prune lavenders back by a third every Spring or Fall.
- Whilst you need to recreate some of the conditions of their preferred habitat you do not need to live in a Mediterranean climate.
- Lavenders are grown in many US states and places around the world despite seemingly unfavorable conditions such as colder weather or higher humidity.
- All you need to do is make a few adjustments and you can enjoy lavenders that produce beautiful blooms and exude a wonderful aroma throughout your garden during the summer.
- If you act quickly, most lavenders that look as though they are dying can be saved by adjusting conditions such as soil drainage, watering, sunlight, soil pH, and refraining from adding fertilizer.
- In almost every case I see the reason why lavender dying is due to overwatering or soil that is too moist. For every reason lavender is dying there is a solution, so just follow the steps in the article and you can not only save the lavender, but it should produce flowers, oils, and aromas in abundance in the next growing season.