

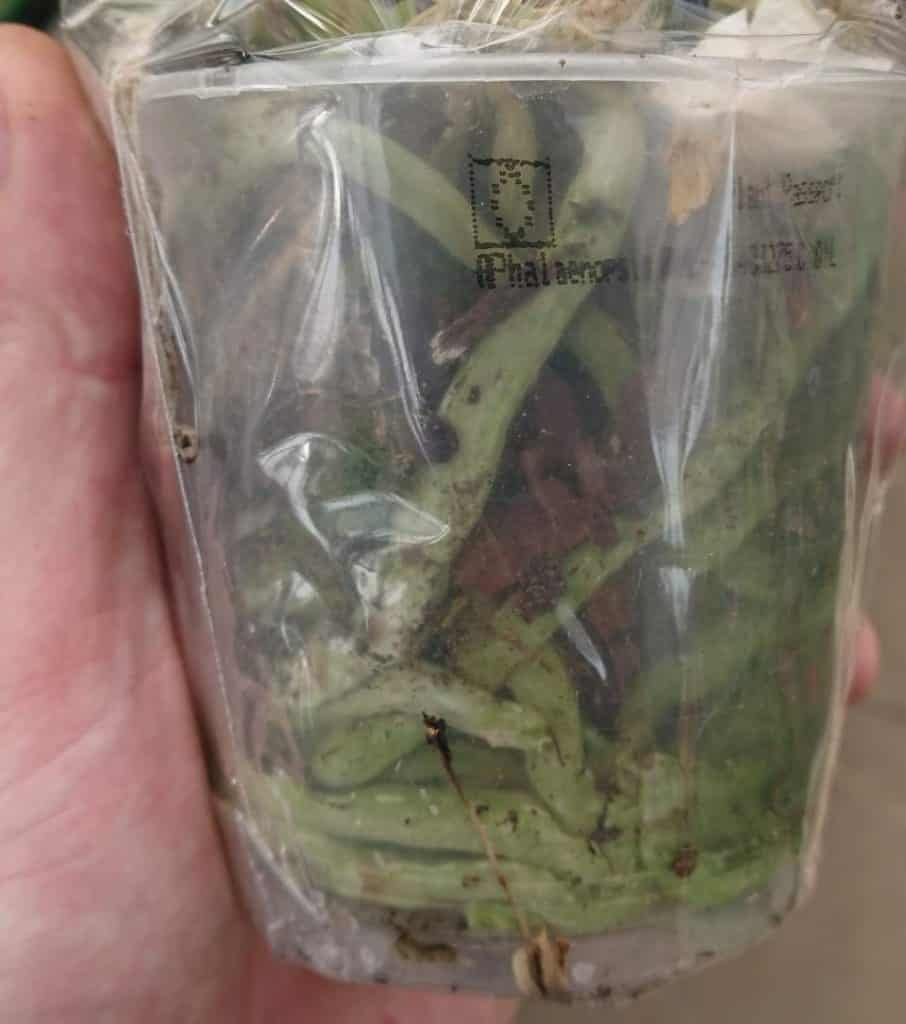
The Phalaenopsis (Moth) is my favorite orchid to grow indoors and has blooms that can last for months. Growing phalaenopsis orchids is easy for beginners as long as you are able to mist the leaves to create humidity, locate them in bright indirect light, and plant them in a well-draining, aerated, pine bark potting mix.
In this article, I will tell you how orchids grow in their natural environment so that we can recreate some of these conditions indoors to successfully grow your orchid.
Here is a table summarizing the main requirements of growing phalaenopsis orchids for beginners:
| How to Care for Your Phalaenopsis Orchids Indoors: | Indoor Orchid Requirements: |
|---|---|
| Best Pots for Orchids: | Clear plastic pots as the roots need light. |
| Best Soil for Orchids: | Pine bark-based orchid potting mix is better than moss. |
| Optimal Temperature Range: | 65°F to 80°F (16°C to 26°C) is the ideal temperature range. Temperature fluctuations cause the flowers or flower buds to drop. |
| Light and Location: | Bright, indirect light. Avoid any draughts or strong air currents from air conditioning. |
| Fertilizer: | Use a specialized orchid spray fertilizer, not a multi-purpose houseplant fertilizer. |
| How Often to Water: | Water around once a week and once every 10-14 days in Winter. Orchids should be watered when their roots turn light gray. |
| Humidity: | Phalaenopsis orchids prefer high humidity. Mist the leaves, roots, and flowers regularly, or use a plant humidifier. |
| How Often to Repot Orchids: | Repot every 2 years as the potting mix decomposes, which can cause the roots to die back. |
| How To Get Orchids to Rebloom: | Trim back flower spike to just above a node. Maintain a cooler temperature of between 55°F (12°C) to 60°F (16°C) for 4 weeks and maintain high humidity. |
Keep reading to learn all the best practices and for a step-by-step guide on how to get your orchid to re-bloom…
Best Pots for Phalaenopsis Orchids Indoors

In my experience of growing orchids indoors, the best pots are clear plastic pots (with holes in the side), and then I place the clear plastic pot inside a heavier, more decorative ceramic, clay, or terracotta pot.
The reason for this is that the orchid’s roots are fairly unique in that they are green (or light gray) and can photosynthesize as well as draw up water and nutrients, so clear plastic pots ensure that the roots have enough light for photosynthesis to contribute energy to the orchid.
Phalaenopsis (Moth) orchids are epiphytes which means they naturally grow on trees in their native environment with their areal roots exposed to light and air.

Photosynthesis is usually exclusively the function of the leaves for most plants, and whilst the leaves are the orchid’s primary means of photosynthesis, the clear pots allow the orchid’s roots to provide additional energy for the plant.
Added air holes or slits in the side of the orchid’s pot allow air to circulate around the roots, similar to its natural environment, which facilitates root respiration and helps to mitigate the risk of root rot.
Plastic pots also help you to determine whether the orchid needs watering or not as the orchid’s roots should appear green after watering and be allowed to dry slightly so that they turn silvery or light gray before giving the orchid a thorough watering.
The problem with plastic pots is that they are very light, and with the orchid’s top-heavy structure, the orchid can topple over.
This is why I recommend placing the pot inside a heaver decorative outer pot which looks aesthetically more pleasing than a plastic pot and counterbalances the top heavy orchid to prevent it from falling over.
Orchid roots are a key indicator of health, so if the orchid begins to look unwell, then you can simply take it out of the outer pot and inspect its roots for signs of rot through the clear plastic pot.
Clear pots are also good because you can see whether the potting mix has decomposed to the point it needs replacing (orchids need repotting every 2 to 3 years).
Important tip: Ensure that the pot is at least 6 inches across to accommodate the orchid root system. It is also worth noting that the wider the pot, the more stability the top-heavy orchid has.
Best Soil for Orchids (Best Potting Mix)

My favorite potting soil for phalaenopsis orchids is a pine bark-based, specialized potting mix. The pine bark chips are large in size, which creates the optimal aerated well-draining structure that orchids need to avoid root rot and stay healthy.
It is important to remember that phalaenopsis orchids are epiphytes that grow naturally on tree branches, using their roots for stability rather than growing on the ground in soil.
Ordinary potting soil is too dense and not porous enough for orchids and would starve the roots of the oxygen they need for root respiration. Ordinary potting soil also retains too much moisture around the roots for orchids to tolerate.
Pine bark chips are also quite large, creating space for the roots to grow and establish through the mixture, whereas other potting soils are simply too dense for the orchid’s roots to grow.
I personally recommend using miracle-gro peat-free orchid compost, which is composed almost exclusively of pine bark chippings.

It is worth remembering that moth orchids grow on the bark of trees in branches up in the canopy of their native humid tropical environment, so pine bark-based potting soil is the potting medium that most closely emulates their natural growing conditions.
Pine bark-based potting mixes are better the peat moss for growing phalaenopsis orchids. A lot of commercial growers use peat moss as it is cheaper than pine bark, however, it decays more quickly, meaning that you would have to repot more often and typically it holds moisture for longer which can increase the risk of root rot.
I also personally do not use peat moss as the extraction of peat moss from the earth is bad for the environment.
Best Temperature Range For Orchids Indoors
The best temperature range for orchids is between 55°F (12°C) and 75°F (23°C), so around room temperature is best for phalaenopsis orchids. If the temperature is significantly higher or lower than this range, then the flowers or flower buds are likely to drop off.
Phalaenopsis orchids prefer a cycle of warmer days and cooler nights within this temperature range as it replicates the typical temperature cycle in their native environment, so be mindful of this as indoor heating or air conditioning reverses this natural cycle.
Phalaenopsis orchids grow in conditions with very consistent temperatures, so any fluctuation in temperature from open doors or cold draughts can prevent the orchids from displaying blooms.
I place my phalaenopsis in my living room away from open doors and on the other side of the room from the radiator.
Phalaenopsis orchids need a period of cooler temperatures around 55°F (12°C) to 60°F (16°C) for 4 weeks to stimulate flowering. (Scroll down to the section on reblooming orchids for more information).
I should emphasize the importance of ensuring that the orchid’s leaves are not in contact with glass as the glass can be much colder at night than the ambient temperature of the room. if the leaves are in contact with the window, they can turn yellow or brown depending on how cold it is.
(I made this mistake myself!)
Best Light and Place to Position Your Moth Orchid

Moth orchids need to be in bright, indirect light when grown indoors. The orchid needs the bright light for photosynthesis and to stimulate flowering.
Phalaenopsis orchids naturally grow in the canopy in bright light but with protection from intense direct sunlight.
If the orchid does not have bright enough light, then it is unlikely to flower. However, if your orchid is in a sunny South facing window, then the sunlight scorches the leaves yellow or brown (depending on the intensity of the sun).
If the orchid’s leaves scorch, then they do not turn green again and recover their appearance, hence the importance of finding the right balance of bright indirect light.
I personally keep my orchids in a room with a South facing window (which provides plenty of light) but use a sheer curtain to protect the sensitive leaves from direct sunlight. I would also recommend a bathroom with frosted glass, which I find does a great job at dispersing the light.
Locate the orchid out of the direct path of air conditioning, open the door, or near any sources of heat. Orchids do appreciate the occasional gentle breeze from an open window, as air circulation is good for the leaves and roots.
Orchids are native to humid climates, so humidity is also greatly appreciated, which is why orchids are often grown in more humid rooms of the house, such as bathrooms.
However, as long as the orchid is kept out of any strong air currents then you can create humidity by misting the leaves or using a humidifier.
I personally prefer using a humidifier around my orchid, as this does the best job of recreating the right level of humidity.
How to Fertilize Orchids (For More Orchid Blooms)

Orchid roots are particularly sensitive and do not tolerate regular houseplant fertilizer as this could burn the roots, however, orchids are heavy feeders and need additional fertilizer to promote vegetative growth and of course for flowering.
Therefore the best fertilizer for phalaenopsis is a specialized spray product. Phalaenopsis orchids grow on trees in their natural environment and their roots absorb nutrients in the humid air or from organic matter in the surrounding area.
A specialized orchid fertilizer contains the right nutrients needed at the right concentration to support growth and promote flowering. With a spray product, you can spray the orchid’s aerial roots, effectively replicating the way orchids absorb nutrients naturally.
With the product I use, I spray the roots with fertilizer every 2 weeks during active growth in the Spring and Summer and then once a month during its Winter ‘rest.’
Little and often is the best approach to fertilizing phalaenopsis orchids as this mimics the typical way the aerial roots draw in nutrients in their native environment. Do not use more fertilizer than the manufacturer recommends, as this can cause your orchid stress. (Have you made this common mistake before? I have!).
Orchids are capable of flowering at any time of year in their native environment, but indoors, they typically have a more dormant period in Fall and Winter in reaction to the decreasing hours of daylight, which is when you should reduce the frequency of fertilizing.
This ensures the orchid has all the resources it needs for a good display of flowers
How to Often to Water Moths Orchids
| Orchids Indoors: | How Often to Water Phalaenopsis Orchids: |
| Orchids in Spring and Summer: | Water indoor potted orchids once per week during active growth. |
| Orchids in Winter: | Water once every 2 or 3 weeks in Fall and Winter. |
| Mist the Orchid Leaves: | Mist the orchid leaves and roots with water at least 2 times per week to create a humid, tropical micro-climate. |
I have found that the best water to water orchids is by watering with a generous soak with the goal of ensuring all of the orchid’s potting medium is evenly moist after watering. Always water your orchids at the roots rather than overhead watering to prevent crown rot.
Crown rot is a common problem associated with watering phalaenopsis orchids as the leaves of these orchids create a funnel shape that channels water to the crown, where it pools and causes rot.
Orchids grow at an angle in their natural environment so that the rainwater can drain away, but indoors, orchids are grown upright, hence the prevalence of crown rot.
However, it is important to note that in my experience, how often you water your orchids can vary according to several factors, such as:
- The average humidity and temperature range of your home.
- The size of your pot or container (smaller pots dry out much quicker than larger pots, read my article, choosing the best pots for orchids).
- Whether the orchid is near sources of heat.
- The type of potting soil (moss retains more moisture than bark).
Whilst watering every 7 days in generally good advice, in my experience I find the best way to establish whether your orchid need watering is to look at the roots.
After watering, the roots should be a healthy green color, and then the roots should turn a light silver/gray as the roots and potting medium dry slightly.
Once the roots have turned silver or light gray, give the orchid a generous soak and mist the leaves and any aerial roots that are growing out of the pot.
Watering this way achieves the balance of providing the orchid with enough water to meet its requirements whilst also avoiding the problems associated with overwatering.
I always recommend growing orchids in clear plastic pots so you can assess the roots’ color and determine whether the orchid needs to be watered.
I recommend always watering with lukewarm water. Phalaenopsis orchids are tropical plants and can suffer shock if the water is too hot or too cold.
I must emphasize that regular misting( or using a humidifier) is important all year round, as low humidity causes the orchid’s buds to drop before opening. Consider how humidity changes during the year in your home, with indoor heating sapping moisture from the air in Winter and increasing the regularity of your misting accordingly.
You can also use a plant humidifier which creates a humid microclimate around your orchid to keep it healthy.
If you are unsure about watering, read my article, How to Tell Whether your Orchid is Under or Overwatered (With Photos).
Do not Water Orchids With Hard Tap Water
Orchids are especially sensitive to the build-up of minerals around the roots when they are watered with mineral-rich or hard tap water.
Therefore, it is important to water orchids with rainwater, distilled water, or bottled water. However, I have found that watering occasionally with tap water is unlikely to cause problems, and generally, watering with soft water is okay.
Consistently watering with hard tap water can eventually turn the orchid’s leaves yellow and prevent the roots from up-taking water and nutrients.
I personally collect rainwater in the garden to use on my houseplants, so if you have the space, then I recommend that you invest in a water butt to collect rainwater for all your houseplants!
I recommend looking on Google to establish whether your tap water is hard or soft and water accordingly.
How Often to Repot Moth Orchids
In my experience, it is best to repot phalaenopsis orchids once every 2-3 years if they are planted in a pine bark-based potting medium and once every 1-2 years if they are planted in peat moss.
From my own experiments, pine bark decomposes more slowly than peat moss hence why the orchid should not need repotting as often.
Pro Tip: I always prefer clear plastic pots as they are very helpful in assessing whether the potting medium has broken down to the extent it needs repotting.
If you do not repot your orchid, the pine bark or peat moss deteriorates to a soil-like consistency, which reduces air circulation around the orchid roots and retains too much moisture, potentially killing the orchid.
Whether or not the potting medium needs replacing, sometimes it is necessary to repot orchids if their roots are clearly restricted and pressing up against the side of the pot.
How to Repot Phalaenopsis Orchids
It is possible to successfully repot orchids at any time of year, but I personally recommend repotting after flowering as the stress of repotting can sometimes cause the flowers to wilt or drop off.
If the roots of the phalaenopsis are clearly pressing up against the side of the pot and clearly look constricted, then ensure that the new pot is about an inch wider in diameter.
I must emphasize having aerial roots that extend out of the orchid’s pot is totally normal, as this is what they do in their natural environment.
In their home range, the aerial roots provide additional stability, absorb moisture from the air, and photosynthesize, so some roots extending out of the pot are totally normal and not necessarily cause you to repot your orchid.
Sometimes I find it may not be necessary to replace the pot, just the potting medium (if the potting medium has decomposed).
Do not choose a pot that is much larger than 1 inch across bigger than the previous pot, as larger pots can retain much more water than the orchid is used to, which can increase the risk of rotting roots.
Larger pots with more growing medium can also cause the orchid to prioritize directing its energy into root development rather than growing flowers
Once you have selected your pot, take the orchid out of its container and tease away any existing potting mix.
In my experience it is best to run the roots under a facet (tap) to wash away any stubborn part of the potting mix that cling on and running it under water makes the roots more flexible and easier to manipulate. (I once skipped this step and the orchid’s roots were so stiff that they were in danger of breaking off!)
Running the roots under water should also turn the healthy roots green, however, it should be noted that roots can be whitish or even yellowish and still be healthy.
The roots that are white or yellow may not have had access to sunlight which has decreased the amount of chlorophyll (which is the pigment responsible for their green color) whereas roots with access to light should be green.
You should feel each root individually. The healthy roots should feel firm when you squeeze them. If they feel spongy and somewhat limp, then these roots are dying, and you should cut them back to healthy growth (or to the base) with a sharp pair of pruners.
Once the roots turn squidgy, they do not absorb water or nutrients and, therefore, do not help to sustain the orchid.
The reason I recommend this is that snipping these dying roots prevents them from decomposing and causing problems in the new potting medium.
Some orchid roots do die from time to time as part of their natural cycle, and as long as all the other roots feel firm and healthy, then it does not necessarily indicate there is anything wrong with the plant.
Once you have cleaned the orchid’s roots, place the orchid in the new pot and fill in the pine bark potting medium around the roots.
The pine bark chips are sufficiently large in size that air can circulate around the roots and retain the moisture that phalaenopsis roots require.
The pine bark chips hold moisture, and then the moisture evaporates, creating a humid microclimate around the roots, emulating the orchid’s natural environment.
I should emphasize it is important that there are no significantly large air pockets around the roots, as too much air flow can dry the roots out.
Useful tip: The best way to prevent large air pockets that I have found is to use a skewer to poke and manipulate the pine bark around the roots more evenly.
Repotting in a transparent pot is the best way to see if the orchid has enough potting medium around the roots and that it is well distributed.
Water the newly repotted orchid with a generous soak and mist the leaves generously to help mitigate transplant shock.
How to Care for Phalaenopsis Orchids After Blooming (And Get Them to Rebloom)
Phalaenopsis orchid blooms can last up to three months in the right conditions before dropping its blooms.
The phalaenopsis can sometimes rebloom on the same flower spike if you cut the flower spike just above the second node under the spent flowers, stimulating a side shoot to form on the flower spike from which new flower buds emerge. I find that mine does around 70% of the time.

However, sometimes the flower spike turns yellow and dries out, which is a normal part of the orchid’s life cycle, at which point you can carefully cut the spent flower spike back to the base with a sharp pair of pruners.
The orchid then has to grow a new flower spike before new flowers can be displayed.
In order to stimulate the development of a new stem and new flowers, the orchid has to experience a specific sequence of temperatures.
You must replicate the phalaenopsis orchid’s natural temperature cycle to initiate new blooms by decreasing the temperature to between 55°F (12°C) to 60°F (16°C).
The cooler temperatures indicate to the orchid that this is the right time of year for flower development.
The most reliable way I have found of doing this is to Place the orchid in a cooler room for 4 weeks with bright light and some humidity, then you can return the orchid to its usual location with warmer temperatures.
From my research, I have found this method is so effective that commercial orchid growers always control the climate conditions (in big commercial greenhouses) in order to sell orchids that are in flower at any time of year.
In my experience, temperature is by far the most important influencing factor to get orchids to flower again.
Because of these specific temperature requirements, phalaenopsis orchid growers often struggle to get their orchids to rebloom in warm climates, whereas some growers do not have to put any effort into stimulating new flowers as their climate and household temperatures naturally follow this temperature cycle.
When growing orchids at home, I find the new flower spike typically grows in Winter, and the orchid flowers are displayed in early Spring and last for 3 months with frequent watering and high humidity (by regularly misting the flowers, aerial roots, and leaves).
(Read my article for more information how to rebloom orchids indoors).
Orchid Blooms Falling Off?
In my experience, it is imperative to avoid any drastic fluctuations in temperature and humidity during bud development and flower displays, as this can cause the buds and flowers to fall off.
Typically, this means avoiding any draughts from cold blasts of air from open doors and avoiding locating orchids in the direct air current of air conditioning or heating.
For more information, read my article: Why are my Orchid Flowers Falling Off?
If your orchid is in any trouble, read my article, How to Revive a Dying Orchid.
I had an orchid that I had to trim the roots due to being all dead except 1-2 roots that at the end ended up dying. Although before I gave up on the plant It had 2 healthy long stems that had roots coming out on top by the new leaves. I cut the long stems and transplanted them in a plastic water bottle actually since the stems are so thin. Is this the right thing to do? how long will it take to have actual roots so I can re plant in a actual container. Thanks!
Thanks for your question Elda!
So I think that removing the dead roots was the right thing to do, but I would excercise caution when trimming dead roots as I’ve seen roots that look somewhat dead, actually recover. But if its gray and papery or rotting then I would cut then away.
So I’m not 100% sure exactly what you are describing. If you could send some photos to my instagram or use the hashtag #gardenerreport I’ll definitely see them and be able to give a more comprehensive reply.
Roots development can take several months, but planting your orchid in a transparent plastic pot is optimal in this case as any remaining roots can photosynthesize which gives the orchid more energy to grow new tissue such as roots and leaves to sustain it.
I would use a humidifier in this case to increase the humidity as the orchid is going to need as favourable an environment as possible to recover.
I would also use rooting hormone to increase thee rate of growth of the roots. I haven’t use rooting hormone on orchid before so I can’t be sure oof its efficacy in a scenario as specific as this but it does work well in my experiments when I’ve propagated lots of other popular houseplants.
I can tell you from experience that the orchid recovery process is often slow so patience is required! A I said, feel free to send me the photos using the hashtag #gardenerreport on instagram and I’ll be able to give you some more specific advice! Best of luck Elda! Mark.