

I love to grow roses in pots, and I have done this for many years, both in my garden and in my job as a landscape gardener. During this time I have encountered almost all the problems I discuss in this article!
Whilst there are a lot of reasons why roses may be dying, are universal, and apply to those planted in garden borders, I have discovered there are quite a few reasons that are specific to roses growing in pots that we need to explore.
In this article, I am going to tell you how to diagnose the reason for your dying rose and give a step-by-step guide for revival from my first-hand experience, with lots of the tips I’ve learned whilst actually trying to save potted roses.
Let’s get to the point!
Potted roses often die because of pots that are too small or pots without drainage holes in the base. Small pots dry out much quicker, resulting in a wilting and dying rose. Pots without drainage holes cause the soil to be too damp, and the rose dies from root rot.
I think It’s important that we remember potted roses require full sun, frequent watering (one good soak per week), and ideally, outdoor placement in an area with good airflow to prevent fungal disease.
Do you have an indoor potted rose? Indoor potted roses die because of a lack of direct sunlight and fluctuating indoor temperatures, which cause the rose to drop its leaves as a sign of stress.
Is your rose dropping leaves, wilting, not growing or flowering, or has a black spot? Then I have good news! I’ve revived lots of potted roses, and there is a good chance they can be revived back to health so they grow and flower the following year.
Keep reading for more on why your potted rose is dying and how to solve it…
Why is My Potted Rose Dying? (Your Pot is Too Small)
So what’s the first thing I insist on checking when someone tells me their potted rose is dying? “How big is the pot?” I always say! Probably the most common reason I see potted roses dying is because the pot is too small. If the pot is too small for the rose then it can cause the rose to die because…
- A small pot means that the roots can quickly become pot-bound rather than establish and grow into soil to access nutrients and moisture. A rose with pot-bound roots displays signs of stress, such as a yellowing of the leaves, leaf drop, and fewer flowers on display.
- In small pots, there is less capacity for the soil and, therefore, less capacity for moisture. Roses require the soil to be consistently moist at the roots during Spring and Summer. The potting soil (or multipurpose compost) should absorb and hold moisture (yet retain a structure that then allows excess water to drain away) so that the roots can access the moisture when required to be saturated. If the pot is too small, the roots can exhaust the supply of moisture and suffer from drought.
- Less soil also means less nutrients available to the rose’s roots which can cause poor growth and fewer flowers.
- Smaller pots also heat up much quicker. Roses grow best in full sun which can cause more evaporation from the soil in a smaller pot compared with a more substantial pot.
Have you also noticed how roses are sold in pots that are proportionately much deeper than most pots? The reason for this is the rose roots grow very deep when established to access groundwater. If your pot is too shallow, then this is likely adding to the problem.
Another very specific problem I see is people planting roses in terracotta and clay pots. I think this looks very elegant, but there is a problem. Have you noticed that on a hot day, the pots dry out twice as fast?
This is because lay and terracotta pots are breathable, which means they can dry out as quickly as a day in intense heat waves, which, of course, can b be the reason your rose is dying.
How to Revive a Rose in Small Pots or Containers
Of course the first step to revive a potted rose that looks to be dying is to transplant it into a larger pot.
If your pot is less than 10 inches deep, then it is likely too small for growing roses.
Ideally, I’ve found that pots should be at least 12 inches across with a similar proportional depth for your rose to thrive.
- Replant your rose in a larger pot that has good drainage in the base.
- Discard the potting soil from the small pot and use good quality multi-purpose compost when re-potting your rose. Compost is the optimal growing medium for growing roses as it has a porous structure to allow for root respiration and to allow excess water to escape so that it does not become boggy around the roots which encourages root rot.
- New compost also has more nutrients available as your rose may have exhausted all the nutrients in the smaller pot, which could have contributed to its dying appearance.
- Water the rose thoroughly when replanted to help it establish and mitigate transplant shock.
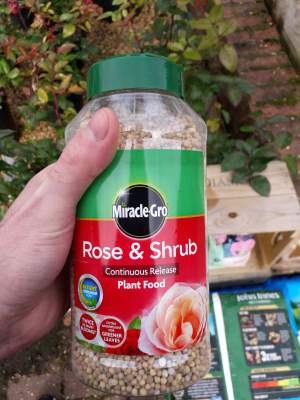
- It is a good idea to add some fertilizer to help revive the rose after planting. Personally, I use miracle-gro granulated fertilizer to feed my roses as it is specifically formulated for roses and contains the right balance of nutrients at the optimal concentration for roses to thrive.
I’ve experimented extensively and even had the privilege of talking to some specialist industry rose growers, and they told me that the best potting mix for roses is equal parts garden compost, leaf mold (which is just leaves that are composted) and well-rotted manure.
Why is this potting mix so effective? The leaf mold acts like a sponge retaining lots of moisture, which decreases the risk of the soil drying out too quickly and your rose dying. The compost provides structure, and the manure retains moisture, but its main asset is that it contains lots of nutrients for your rose to thrive. Ever since I switched to this potting mix, my roses have thrived.
Pro tip: Is your potted rose drying out too quickly? Repot it to a plastic or glazed ceramic pot (as long as it has drainage holes in the base), and it is preferable if it’s a lighter color. Plastic and ceramic pots are impermeable, which means they retain more moisture to prevent the rose from drying out too quickly on hot days.
I’ve personally experimented with lighter-colored pots, which reflect light and heat away from the soil, whereas darker pots absorb the heat and dry out noticeably quicker. I find this tip ultra useful if you live in a hot climate!
When you have transplanted you’re dying rose to a larger pot, place it in full sun and water it generously twice a week for the first 3 months to help it establish. I would water roses as often as required to keep the soil moist.
To check whether they need watering, I use my finger to see if the soil is damp or not. If the soil is slightly drying out, it is time to water. I would rely on this method rather than using a water meter, as I found these are just not accurate enough.
Follow these steps, and you can give your potted rose the best chance of recovery.
(If your rose is not flowering read my article for the solution, why is my rose not flowering?)
Your Rose is Dying in Pots Due to Poor Drainage
Let’s consider another reason why our roses may suffer…another cause of dying roses that is specific to pots is root rot due to:
- Pots or containers without drainage holes in the base.
- The use of trays underneath pots prevents excess water from draining away from the roots.
As we discussed, roses require soil that holds moisture yet allows excess water to drain away to prevent the soil from becoming saturated. In boggy soils, the potted rose is vulnerable to the fungal disease root rot.
Therefore you must plant your rose in a pot that has several drainage holes in the base so that excess water can drain out the base of the pot. This a problem I have seen and heard about more often both in real life and from readers of this website who email me photos of their dying potted rose.
I have observed a trend of roses being sold in decorative pots that look great but don’t have drainage holes in the base.
I would also caution you about using drip trays or placing anything underneath the pot. This collects water, and the soil stays boggy, which inevitably causes root rot and causes the rose to die. A lot of people do this for their potted roses on a patio to prevent water spilling, but you need to be aware that it could be a problem if your rose is sitting in water.
If your rose has a dying appearance with stunted growth, and the leaves are turning yellow or brown during Spring or Summer then this is almost certainly as a result of root rot.
If your rose’s roots are severely infected, it can be very difficult to revive them. Often, it is better to discard the rose and the potting soil (as the soil can still host the infection), wash the pot, and buy a new rose. I haven’t seen anyone have much success reviving roses with root rot, even with drastic interventions such as cutting off diseased roots, as roses don’t tolerate that level of shock and die anyway.
However, if you catch the overwatering problem early enough, then your rose can be saved. What you need to do is replant the rose in a new pot (with drainage holes in the base) with a well-draining potting mix (change the soil as it could harbor fungal pathogens) and cut back any dying branches. Then there is a chance that the rose can recover, but to be honest this is rare.
This highlights the dangers of overwatering, as most plants are far more prone to overwatering (or boggy soil by some other means) than underwatering.
Why is My Potted Rose Dying After Winter?
Is your potted rose looking worse for wear after Winter? If a potted rose is dying after Winter, then this is usually because of two reasons:
- Rose roots are more sensitive to the cold than any part of the plant. When roses are planted in garden borders, the soil acts as insulation from frost and protects the roots. However, pots are more exposed to the cold, therefore the rose’s root system is potentially more vulnerable to frost damage which can harm or kill the rose.
- Root rot is more prevalent in Winter due to the lower rates of evaporation. Cold, damp soil promotes the conditions for fungal disease which can be the cause of a dying rose.
Is your rose in a pot that is somewhat on the small side? If the pot or container is small (less than 10 inches across), then the pot may not have the capacity for enough soil to act as insulation for the rose’s roots.
I have personally seen this in a customer’s garden.
The problem was that the rose had significantly outgrown the pot. However, the rose hadn’t shown any ill effects from being in a pot as the owner had been watering it diligently and using fertilizer so it didn’t dry out or run out of nutrients which is what usually happens.
However, the rose had such an extensive root system in such a small pot that I scratched back some soil and saw that some of the roots were actually pressed up against the side of the pot.
In addition to this, I noticed the pot was made from thin plastic, which I think made a real difference. It meant the rose’s roots (which are much more susceptible to cold damage than any part of the rose that is above ground) were feeling the cold!
This poor growth in the Spring with more dying branches the you’d expect after Winter (Typically I prune back 2 or 3 dying branches after Winter even in healthy potted roses).
Don’t worry! Frost damage may not kill the rose entirely, so there is often a chance of reviving the plant.
The best course of action is to wait until the Spring to see if there is any new growth emerging from your rose. It is at this point I repot the rose into a much larger pot. The larger pot means there’s more soil which acts as insulation which should help prevent any further damage and contribute to revival of your rose.
My Best Tip For Potted Roses in Cold Climates: So what I’ve found works really well is to plant roses in thicker ceramic pots when in climates with frost and freezing temperatures. This helps to insulate the rose’s roots from the cold in Winter, and in my mini experiment, it increased the survival rate of roses after Winter. Not only that, I found that the roses in larger pots (and therefore had more insulating soil) and thicker pots had an advantage over roses in smaller, thinner pots when it comes to getting started growing in Spring!
I then cut away any dead or damaged branches with a pair of pruners (use protective gloves) back to healthy growth. This will help stimulate new growth and increase airflow.
Your rose should be able to recover over the Spring and Summer; however, if there is no significant new growth, then the roots are too damaged for the rose to revive.
Prevention is better than cure with root rot as it is very difficult to revive a plant that is badly infected. To prevent root rot during Winter:
- Plant roses in a well-draining potting mix.
- Ensure the pot or container has several drainage holes in the base for excess water to escape.
- Scale back any watering during Winter. The rose can likely attain all the moisture it requires in Winter from rainfall. If you live in a climate with a dry Winter, water the rose once every 4 weeks so the soil does not dry out completely.
Pro Tip: Are you growing potted roses in a climate with high winter rainfall? Then plant your roses in clay or terracotta pots, as they are porous and allow the winter soil to dry a little easier, thus mitigating the risk of root rot. You can also add some grit to the potting mix to increase drainage if damp soil is a significant problem! In my experience, these two tips work really well.
The symptoms of root rot are yellow or brown drooping foliage, poor growth, and the roots look dark brown and smell really bad!
If your rose is not growing after Winter due to root rot it is better to burn or discard the rose and dispose of the potting soil as this can host the fungal pathogen that is responsible for root rot.
I would also recommend that you wash the pot or container thoroughly before planting any more plants to prevent the spread of the fungal disease.
Dry Soil? Your Potted Rose Could be Dying Due to Underwatering
How often should you be watering potted roses? Good question! The answer is it depends on your climate and the weather, so there isn’t a universal time frame for the watering frequency that is going to apply to every reader of this article.
However the more helpful and informative answer I have for you is that you should aim to water your potted roses as often as required so that the soil is evenly moist. This could be every 3 days in a heat wave or every 2 weeks if you have had some rainfall and overcast days. Test the soil’s moisture yourself so that you can tailor your watering frequency to meet your roses’ requirements in your climate.
As we discussed, my method for assessing whether a rose needs watering or not is to use my finger to detect the moisture, as I find moisture meters (which I have tested many times) are not accurate enough.
Pro Tip: Want a different quick way to test whether your potted rose’s soil is dry or not? I pick up my potted plants after watering and then periodically throughout the week to assess their weight. When I start to notice that my pot is light, I know it is a good time to give my rose a good soak.
Regardless of how often you water your rose, I can tell you what is absolutely imperative to water enough so that excess water so that a trickle emerges from the base of the pot.
This should ensure that your potted rose is hydrated and encourage the roots to establish.
If you water your rose lightly, only the top few inches of the potting soil are moist, and the roots cannot draw upon the water, leading to wilting leaves and stunted growth.
Consistently light watering can also encourage the roots to grow near the surface to find moisture, making the rose more vulnerable to drought.
I want to reemphasize that watering once per week may not be enough in hot and dry climates or during a heat wave.
(Read my article, why is my rose wilting?)
Roses prefer when the soil is consistently moist at the roots (but not saturated) and can suffer from drought if the pot dries out too quickly.
(For the full guide on how often to water roses in different conditions, read my article on how to water roses properly).
Here are some of the best practices that I’ve learned through some trial and error that I use to prevent my potted rose from suffering from the effects of drought:
- Plant your rose in a large pot. Larger pots contain more soil and can retain more moisture.
- Ensure that you plant the rose in good quality compost as this helps to hold moisture and also has the structure to allow excess water to drain out of the base of the pot, which creates the optimal moisture balance for growing roses. I love adding lots of leaf mold (which is just composted leaves) to my potting mix. Why, I hear you ask? Because leaf mold is the best potting amendment to retain moisture, yet it is also well-draining, which is exactly what roses need.
- Water your potted rose as frequently as required to ensure that the soil is consistently moist. Typically the advice is to water roses once per week but increase watering frequency in a drought or heat wave as pots dry out quicker than garden boarders.
Is your rose wilting and dying despite watering?
Sometimes what I see is a potted rose that has been in full sun all day, and the soil has baked hard. What happens then is that the surface of the soil becomes hydrophobic and repels water off its surface, and the water trickles off the surface and down the side of the pot.
Look at the soil…has it shrunken away from the side of the pot? This is a clear indication that the soil isn’t absorbing the water properly. So what do we do?
My secret for saving a rose suffering drought stress due to baked, dry soil is to fill a wheelbarrow with a few inches of water and place the potted rose in there for half an hour.
When you come back, you’ll notice the soil has drawn up lots of moisture through the drainage hole in the base, and the pot will be much heavier as the potting soil is going to be evenly moist! The potting soil should now be evenly moist, and as long as you regularly water it (to prevent the soil from drying out completely), the soil should keep absorbing moisture rather than repel it off the surface.
If the rose is watered frequently, then it can recover from drought, and the leaves should perk up. Watering should also positively impact the display of flowers.
(Read my article, choosing the best pots for roses).
Lack of Sunlight (Potted Roses Require 6 Hours of Direct Light)
I’ve learned that one of the keys to growing roses that bloom beautifully is the more sunlight, the better. All roses require full sun (at least 6 hours) to thrive, whether they are planted in pots or in garden borders.
I can personally attest that the amount of sunlight is directly correlated with the number of flowers a rose displays, so if your potted rose is not flowering particularly well, then move it to a sunnier location as soon as possible.
A lack of sun is also associated with poor overall growth, and from what I’ve observed, the leaves of your potted rose may also turn brown or yellow and begin to drop.
In fact, I had a comment from Kemi asking about whether a lack of light may be causing her roses leaves to turn brown at the edges:
“Hi I have a potted yellow rose , that I bought on a whim.
It’s sprouting new leaves, but the roses have brown edges and don’t look happy . Would a plant light be enough light , instead of sun.
Can too much watering result in brown edges on a rose?thanks,
From kemi.“
I think in Kemi’s case the lack of light was the issue.
There is no rose variety that grows well in the shade, so if you want your potted rose to thrive, locate it in a nice sunny spot as soon as possible. If you move it quickly enough, it should start to show signs of reviving within a couple of weeks, with new green growth emerging.
I personally recommend the morning sun followed by shade in the afternoon. Why? Because the rose gets lots of sun in the morning when the temperature is cooler. I’ve found when potted roses are in afternoon sun, the pot can dry out too quickly!
To be honest, when I’ve been tasked with reviving a potted rose dying due to a lack of sun, I found it can take an entire year before the rose looks good again, so some delayed gratification is required, but it’ll be worth it.
Does Your Potted Rose Have Black Spot?
There are a host of fungal diseases that affect roses but by far the most common is black spot. In fact, I spoke to a specialist rose grower, and they told me that the problem is so prevalent that it has even adversely affected the sale of roses worldwide.

Rose growers have even grown disease-resistant varieties of roses, which are less likely to get black spots, but the fungus evolves and can even affect these resistant varieties.
Black spot is a type of fungus that affects the leaves of your rose with black or brown blotches that can turn the rest of the leaf yellow.
Black spot doesn’t necessarily kill your rose but it does cause leaf drop reduces flowering and results in the rose generally looking unwell.
Black spot affects all roses but can particularly be a problem for potted roses if they are crowded with other potted plants or in an area with little airflow around the foliage. I most often see it in roses that are very crowded in a rose bed.
The risk of black spot is increased if you water the rose overhead onto the foliage, so ensure that you water your potted rose at the base of the plant. I would avoid sprinkler systems with spray water indiscriminately.
Whilst an increase in airflow around the foliage can help to mitigate black spot and other fungal diseases that affect roses, it can still be a difficult problem to control as certain weather patterns promote the conditions for fungal disease.
Tips for Reviving a Potted Rose with Black Spot
Whilst black spot is a common disease for rose growers it should not necessarily kill your rose and I have personally treated it successfully.
What worked for me is to collect any affected leaves of the rose that have fallen due to black spot and burn or discard them.
The spores of the black spot fungus are spread easier in wet or windy conditions so it is advisable to avoid tending to a diseased rose in damp conditions as the spores can easily be spread on a pair of gloves or pruners. I always wat for a nice summers day to do this job.
Always sterilize pruners after use with disinfectant or alcohol gel to prevent spreading any disease to otherwise healthy plants. I soak a cloth in hand gel and wipe the blades of my pruners and spray my gauntlets with disinfectant spray, although you could even wash them in the washing machine.
I then use a fungicide spray made specifically for roses from the garden center (or online) and follow the manufactures instructions. I have used several different brads but I actually spoke too a rose disease expert who was in the know and she told me that the active ingredients is the same in each spray, so go for the cheapest one!
Generally, it took me several applications over the course of a few weeks to treat the fungus, but with enough time, the rose I was treating revived. I must warn you that this is not a quick fix, and your rose may not flower well or look rejuvenated this year, but the roses that I have treated have looked good for the following years of flowering (always follow the manufacturer’s instructions).
Is Indoor Potted Rose Dying?

I felt I had to include this section in the article as some readers have asked me about this previously, but I’m not a massive fan of indoor potted roses Indoor potted roses are very difficult to keep alive for a long simply because roses are a plant that thrives outdoors and at best endures indoor conditions but more often dies.
There are several reasons why your indoor potted rose could be dying:
- Not enough light. Roses of all species require at least 6 hours of direct light to flower and thrive. If they are in the shade, then they tend to drop leaves, flower poorly, and eventually die. Bright, indirect light is not a good enough compromise when growing roses, as they really do require direct sun.
- Air circulation. Roses are susceptible to several fungal diseases in areas with poor circulation, with black spots being the most common. Even when potted roses are outdoors they benefit from being located 3 feet away from other potted plants to encourage air to circulate the leaves to avoid fungal disease.
- Fluctuating temperatures. Roses are specifically adapted to coping with seasonal changes and differences in temperatures, sunlight, etc., throughout the year. Indoors the temperature can fluctuate drastically in an unnatural way. Roses are accustomed to a cooler evening, whereas indoors at night, the temperature can increase significantly, particularly if the rose is near a source of heat. This drastic contrast in temperatures can cause leaf drop and is often the cause of a dying indoor rose.
These problems are emphasized when growing potted roses indoors, but other factors could also contribute to a dying rose, such as under or overwatering and root rot due to the use of a tray under the pot, which prevents excess water from escaping.
How to Revive Indoor Potted Roses
The only way to properly revive indoor potted roses is to move or plant them outdoors! Which I know is contrary to their purpose, however, in my experience, roses generally do not thrive when indoors and almost always die.
You can either plant them in the ground in well-draining soil rich in organic content or replant the roses in a bigger pot to give them a good chance of reviving, and believe me, they can revive once they are outdoors.
I always tell people that looking after plants and reviving them is fundamentally about creating their optimal conditions for growing.
Usually, indoor potted roses do recover when placed back outdoors if they are placed in full sun (more than 6 hours of direct sunlight) and watered generously once a week (water potted roses 2 or 3 times a week in hot and dry conditions) and in an area with good circulation to prevent black spot.
I would seriously recommend a larger pot (at least 12 inches across) as this is going to provide the rose with enough soil and space for the roots to establish and prevent the soil from drying out too quickly.
I also recommend trimming away any drooping flower heads that are not opening or turning brown so the rose can redirect its energy to new healthy growth.
When placed back outdoors, the potted rose should show signs of recovery within a few weeks if it is Spring or Summer, although I would keep an eye on the soil’s moisture as the rose is likely going to be more thirsty when it’s outdoors.
(Read my article, why is my rose drooping?)
Do you have any more questions about potted roses that you need answered? Or maybe some insights of your own? Please leave a comment below, and I’ll reply! I enjoy solving potted plant problems, and I’d love to hear from you!
Key Takeaways:
- A dying potted rose is usually caused by the pot being too small, which causes the soil to dry out too quickly, causing the leaves to wilt, or by the lack of drainage holes in the base of the pot, which causes the rose to die from root rot.
- To revive dying potted roses, plant them in a larger pot that has a greater soil capacity and, therefore, for moisture and nutrients.
- Ensure that the pot has several drainage holes in the base and remove any trays underneath the pot, as this stops excess water from escaping and can cause root rot, which is the cause of the dying rose.
- Potted roses require full sun and watering at least once per week.
- Place indoor potted roses outdoors, as they require direct sun and airflow. Potted indoor roses often die due to fluctuating indoor temperatures and less direct light.
2 thoughts on “How to Revive a Dying Potted Rose”
Leave a Reply
Recent Posts
Indoor palm trees are some of the most elegant houseplants you can grow, and they are exceptionally easy to care for once you know their preferred conditions. The key is to mimic some of the...
Monstera deliciosa (Swiss cheese plant) is remarkably easy to propagate in water, and propagation can be a good way to reduce the size of any large and out-of-control monsteras that have outgrown...
Hi I have a potted yellow rose , that I bought on a whim.
It’s sprouting new leaves, but the roses have brown edges and don’t look happy . Would a plant light be enough light , instead of sun.
Can too much watering result in brown edges on a rose?thanks,
From kemi.
Hello Kemi, thanks for your question. Let’s save your potted yellow rose!
So, in my experience brown edges can be caused by several factors: Not enough water, a lack of nutrients, fungal disease and sometimes too much direct sun in scorching hot climates.
However, the new leaf grow is a really good sign your rose is resilient and fighting back!
Grow lights can supplement light for roses but to be perfectly honest roses really need at least 6 hours of sunlight to remain healthy.
Yes absolutely you are right in that overwatering can cause brown edges. So I’d make sure you have a good well draining pot.
You should only water your roses when the top inch of soil feels dry to the touch.
My roses always grow better with morning sun followed by afternoon shade (as the heat and the sun can be quite intense in the afternoon) which can help address the symptoms of brown leaf edges.
I would also use a fertilizer that is specifically made for roses I’ve personally experimented with different fertilizers such as liquid seaweed but I’ve found that the specific fertilizers made for roses work better.
If you make these adjustments to its care, your rose should revive, but if you need any more specific advice, please comment and I’ll reply again. Thanks Kemi and best of luck with your rose! Mark.